
Note: I am starting a series of “Practising Weathering” posts. The aim is to show my techniques for weathering models and layout.
Are you the type who buy and run your model locomotives and rolling stocks in as-is condition i.e “pristine” plastic condition or do you weather them to make them more realistic to the era and theme of your layout? There is not right-or-wrong answer here. I guess it depends on the taste and interest of individuals.
I wanted to explore other aspect of model railroading hobby – weathering. To me, weathering is making the models – rolling or static – more realistic look to the condition and usage of the model as well as era. For that I have chosen Baureihe (Class) 74 854 as the first candidate from my weathering practice.
Baureihe (Class) 74 as Practice Piece

Original “pristine” condition of Baureihe 74 856 from Märklin Digitalset 29074
This tank locomotive was chosen as a model that I was willing to “sacrifice” for my weathering practise. Steam locos have nooks and crannies that make weathering more interesting compared to electric and diesel locos. Pipes, wheels and other partially hidden parts are visible and thus making them interesting work areas. In the above model, there are 2 water tanks, one on each side of the loco in front of cab. Behind the cab is a coal storage. In addition, steam loco operates with coal and water. Lots of opportunity to make it “dirty” and “oily” with various materials such as oil and enamel paints and washes.
Make Your Own Washes

Home-made washes
I learned this technique from Martim Tärnrot from Märklin of Sweden and made my own 2 washed using Vallejo Black Grey for grey washes and Vallejo Burnt Umber for brown washes, both with lots of water and isopropyl alcohol. Martin recommended the mixture proportion but I adjusted according to my needs.
I applied the washes with soft brush and using reference photos of steam engines as guides. Using airbrush is optional and at this stage.
First Layer of Washes
Building up the first layer of washes
The first layer washes covered mainly the water tanks and overall on the boiler and wheels. The purpose was to remove the shine from the wheels and body. I let the model dry and did not make further weathering for few months.
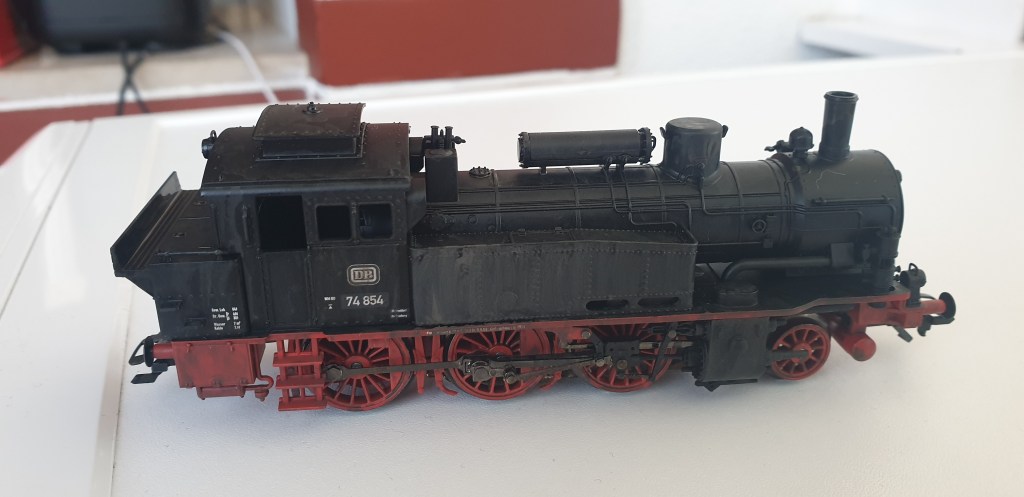
Second Layer of Washes
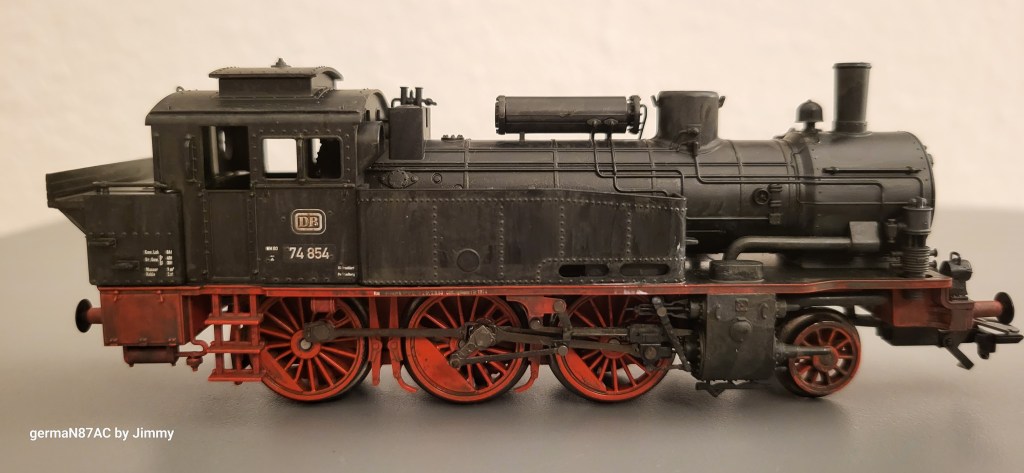
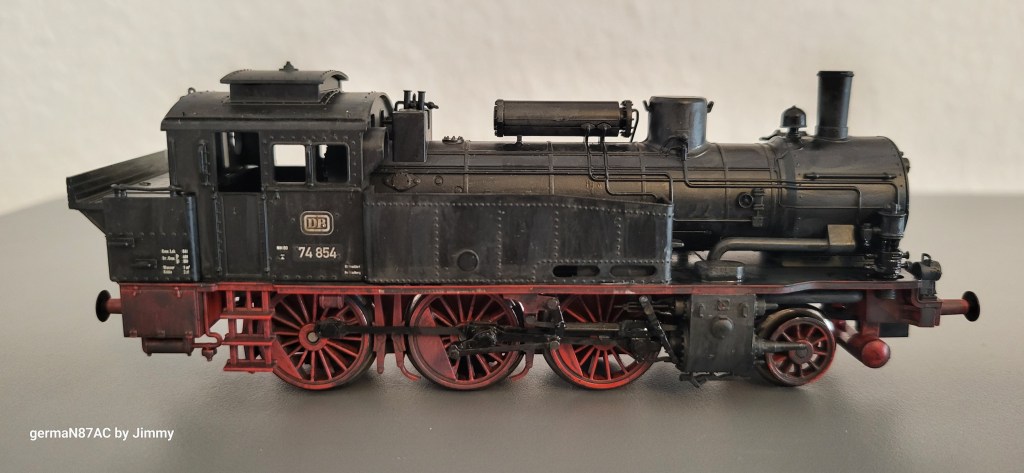
This time, I added the second layer of washes – more on the wheel and on the water tank and boiler. You can see that the wheels are being to change from bright red to more grims and oil stains on the counterweights was well as moving parts. The water tank also received more dust and some water streaks and chalks.


From the top angle and front view, you can see the dust stains on the water tank, top of the cab and boiler.
At this stage, the washes are sufficently to remove the “plastic” shine on the model. My next task is to add soot and oil washes on certain moving parts such as the shafts and compressor pumps with oil and enamel washes and paints as pigments.
Stay tuned.
